Uncategorized

In preparation for the festival season last year, I built a swamp cooler! Swamp coolers, also called evaporative coolers, are air conditioners that work without a compressor; they simply cool air by passing it across some water. I think they’re popular for desert camping events because they’re easy to build yourself (no refrigerant or compression) and because they don’t require much power to run (only a fan and a pump in my build).

So evaporative cooling is really fascinating. You’re probably physically familiar with evaporative cooling as it relates to sweat, but, for reference, I will try to restate the model I learned in high school of how it works: when you have water on your skin and air blows across it, some of the highest energy particles in the liquid water collide with air particles at the interface of the water and air, and the air particles impart enough energy that the water particles are freed from the liquid state and enter the vapor state. The net effect for the liquid water is that there are fewer high energy particles in the liquid, and the temperature decreases because temperature is a measure of the average kinetic energy of a collection of particles. As a result, your skin feels cooler. The surprising thing about this process is that the air that passed over the liquid also decreases in temperature. This is because momentum from the air particles was transferred to the escaping water molecules; however, after the water molecules enter the vapor state, they are not as energetic as the air molecules were because some of the kinetic energy was used to oppose the cohesion of the water molecules in the body of liquid. The enthalpy of vaporization is the kinetic energy that was used.

This same effect is used in a swamp cooler, but instead of a pool of water on skin, the water is usually soaked up into a foam pad, and then a fan is used to blow water through the holes in the pad. A swamp cooler may be surprising to someone familiar with a normal air conditioner because, unlike a normal air conditioner, where one side (sticking out the window) heats up and the other side (pointing in to the room) cools down, both the water in the swamp cooler and the air coming out of it get colder. Magical.

Anyway, I followed some of the guides you can find by searching for “5 gallon bucket swamp cooler”. I won’t go through all the build steps here, but here are some links to such guides.

One thing I was confused by was the direction to orient the fan: whether air should get sucked in on the sides and blow out the top, or the reverse. There are guides online that show both ways. The answer is that the evaporative cooling effect works regardless of the direction the air flows, but, for convenience of directing the output into a tent, it’s better to blow out the top.

Materials
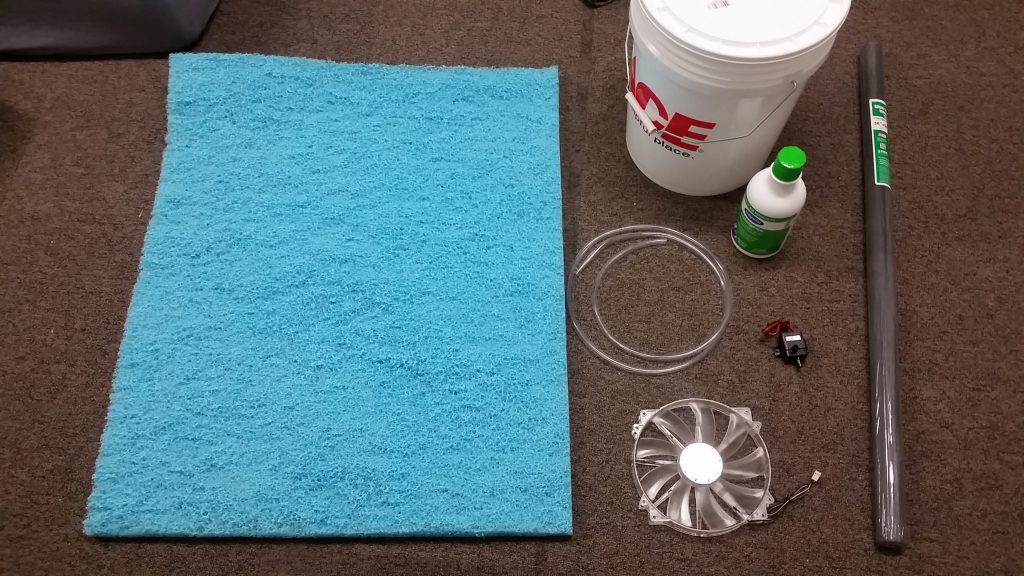
Here are materials I used to build the swamp cooler: evaporative pad, 5 gallon bucket, aquarium tubing, anti-bacterial juice, pump, fan, window mesh.

I found some of these materials a little hard to source in San Francisco, so here are links to each of the ones I used.

  • Duracool evaporative pad: Cole Hardware has these on their website but not in their store, but you can order them and then pick up from the store. One of these is enough for two swamp coolers (or maybe one with doubled-up foam?)
  • 5 gallon bucket and lid: most hardware stores will have these
  • Anti-bacteria juice, from Amazon
  • 12V aquarium pump, 2-pack from Amazon
  • 12V big computer fan, from Amazon
  • Aquarium tubing: obtained from an aquarium supply store
  • Window mesh: most hardware stores will have this

As you can see, a lot of the items I found were in quantities of 2 or more, so if you’re interested in building one, it might be nice to find a friend who’s also interested.

I ran the cooler off a 12V lead acid battery or a 12V power supply. I also picked up some plastic dryer ducting to channel the air that comes out.

Result

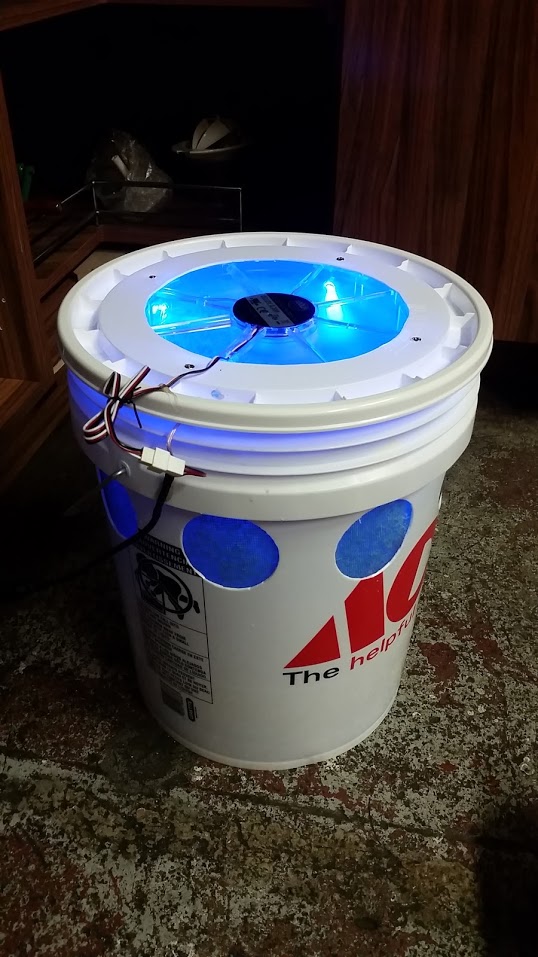
And here’s the final result! I never actually got a chance to use it last year, but I’ll give it a try this summer.

The fan I used was a large computer fan with a blue LED, which I felt imparted an “icy” feeling.

After building this, I’ve also got some ideas for some improvements.

For one, the aquarium pump is really just used to move water from the bottom of the bucket up to the top to drip down the foam pad. I suspect you could put the reservoir above the foam pad and then, maybe with some creativity in a valve for the drip rate, let the water simply drip down the pad.

It would also be nice to have independent switches for the fan and pump: sometimes I just wanted to run the pump, to see if any water was dripping out, sometimes I wanted to run the fan, to dry out the foam before putting it away.

Finally, I think it would be worthwhile to build this device out of some kind of telescoping bucket; right now it takes up a lot of volume, but it’s mostly empty space.
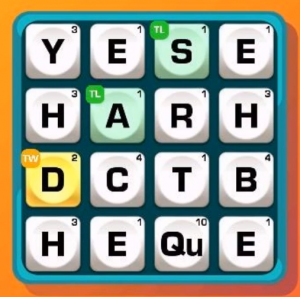
I’ve been playing a lot of Boggle recently, specifically Zynga’s Boggle with Friends (formerly called Wordstreak), and I always experience a little mischevious joy every time I encounter a vulgar or adult word in the game–especially because anatomical words are so often long and high-scoring. This got me thinking “wouldn’t it be great to win a game, but with exclusively dirty words?” This led me to write my “Dirty Boggle Solver”. I implemented it in C++ as a command line utility, which you can get from my github here, and in this post I’ll explain how it works.

Rules of Boggle

First, let me give a brief explanation of Boggle for those who haven’t played before. Boggle is played on a 4×4 grid of randomly picked letters, and the goal is to find words by stringing together adjacent letters in order. Using one letter twice is not allowed.

There are a couple variations in terms of scoring. In the original game, words were score by word length: 3-4 letters worth 1 point, 5 letter words worth 2 points, 6 letter words worth 3 points, etc. In Zynga’s Boggle with Friends, they introduce more scrabble-like scoring in that each letter is wortha specific value, and there are double-letter, triple-letter, double-word, and triple-word tiles, which multiply the score for a letter or for a whole word. There are also additional points for word length.

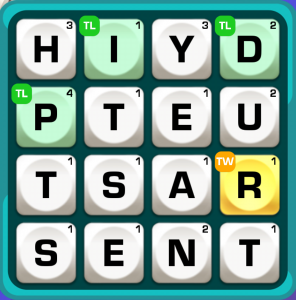
Players must find words in the 4×4 grid in this screenshot of a Boggle with Friends game.

Human Strategy

I first got really into Boggle in the summer of 2010, where I learned a key strategy, which is to find words-inside-of-words. For example, on its own, the word “stared” is pretty good, worth 3 points by the original rules; or in Words with Friends, 7 points for the letters and 6 points for the length, for a total of 13. However, you can earn many more words by noting that “star”, “stare”, “tar”, “tare”, “tared”, and “are” are also contained within the word. It is often easy to find an additional word by tacking on an “s”, a “d”, or an “r”. And that’s not to mention reading the word backward, where you get “rat”, “rats”, and “era”. These are great because you don’t need to spend additional time searching for words (which is the time-consuming part of Boggle).

This screenshot from Boggle with Friends includes the word “stared” — worth only 13 points by itself, but worth over 60 points when you also grab all the subwords. (ignoring multiplier tiles for these calculations)

This sub-string strategy has some similarity to the strategy I used in my solver, which I will describe next.

The Solver

As noted by the answer to this quora question, there exist about 12 billion strings on a 4×4 Boggle board. So, one naive solution to make a Boggle solver would be to check every one of those strings against a list of words and return just those that are words. This is exactly how I wrote the first version of my solver, which you can see at commit 0266cfe. In this version, the program opened a list of dirty words, stored them in a hash table, and then it recursively checked every string in a 2D array representing the board.

However, this approach can be improved upon. Consider the example of this board:

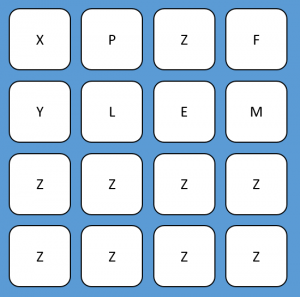
This made-up boggle board contains the word “xylem” as well as lots of paths that are not valid words.

A solver as described would first start with the X tile. It would check if “X” by itself is a word (it isn’t), and then continue. Next, it would append a tile to the string, checking if each of “XP”, “XY”, and “XL” are words. And, for each of these strings, it would continue on, appending letters and checking if the letters make a word, until it has checked every possible string. This approach causes the solver to go down too many paths. “XP” is not a word, but also there are no English words that even begin with “XP”. As a result, the solver wastes a huge amount of time exploring strings that are infeasible based on what they start with.

The optimization I used was to use a prefix tree (or trie) to guide the search. A prefix tree contains strings (or arrays of anything), where words with common prefixes share a common node.

This is a prefix tree for a lexicon consisting of the words “cat”, “car”, “carrot”, and “cold”. As shown in this diagram, each letter is a node in my implementation. The star (*) indicates the end of a word; as shown by “car” and “carrot”, a node may be the end of a word while also having child nodes that lead to a longer word, also marked with a star.

First, I made the program load the list of words into a prefix tree. Then, as the program explores strings, it also checks the prefix tree to see if the current string actually has any descendents in the prefix tree of real words. If not, then the program stops exploring strings beginning with that string.

For example, in the previous example, the program would first check if “X” is a word. “X” is not a word itself; however, there are descendents in the prefix tree, implying that there are words that begin with “X” and thus that it’s worth continuing to search for strings beginning with that tile, so the program continues. However, when the program encounters “XP”, it checks the tree and finds that “P” is not a child of “X”, implying that there are no valid words that begin with “XP”. As a result, the program stops exploring paths that begin with “XP”. It then moves on to the string “XY”, exploring longer and longer strings until it finds the word “XYLEM”, but moving on quickly from paths that won’t produce words.

Result

As you can see in the repo, I made a Python script to measure the performance of the program by timing the search phase. I used the script to run 100 trials of the program at commit 0266cfe (just before adding the prefix tree) and 91b9ce9 (just after). I used the same seed both times, so even though the script generated 100 different boggle grids, the first trial used the same 100 grids as the second trial. In the commit without the prefix tree optimization, the program starts by loading the list of dirty words into a hash table, so it’s constant time to check if a string is a valid word, but the number of strings checked is much higher than with the prefix tree.

On my 2.0GHz CPU with minimal other processes running, the average solve time without the prefix tree was 8290 milliseconds; with the prefix tree, the average solve time was 8.32 milliseconds. That’s about a 1000x speedup!

Trie Implementation

As I was writing this solver, I searched for trie implementations in C++, but I didn’t find any that I liked, so I wrote my own, in trie.h. I wrote a node class, which contains information about its content (a letter), its children, and, regardless of its children, whether that node marks the end of a word. I also wrote a trie class, which contains a root node (and then the root node has child nodes, etc).

My trie class exposes methods like insert (adds a word to the trie) and searchWord (checks if a word is in the trie). However, my boggle solving program actually starts the search from each node, and only checks if there are children for that node, or if that node terminates a word, for which I expose the findChild and wordMarker methods.

I also wrote my classes to be agnostic as to the type of content actually stored — it could be a list of letters, a list of objects, whatever.

Boggle with Friends actually combines “Q” and “U” in one tile, so I made each of my nodes contain a std::string. Most nodes contain a string with only one letter, but some nodes contain the string “QU”. When loading in my list of words, my program discards any words with a single “Q”, so technically I could have just treated “Q” as an implicit “QU”; however, I felt it would be clearer if my prefix tree reflected the actual spelling of each of its word.

Usage

If you’d like to give my program a try, simply download the source from github, run make, and then run the “solver” executable in your terminal. It starts with a command-line interaction for entering the letter grid, which you can do one letter at a time.

Conclusion and Future Improvements

One thing to note about this implementation is that the program loads up a list of words when it starts. In my case, I have compiled a list of dirty, dirty words. But there is no constraint on this list; it turns out this Boggle solver is also a regular old Boggle solver if you just supply it with a full dictionary, such as /etc/whatever/words, or the official Scrabble dictionary. So go nuts!

Overall, I’m quite pleased with the result and enjoyed writing it. I also used this project as an opportunity to work on my C++ chops, so let me know if you have any style suggestions.

Here are some other ideas for future improvements:

  • build the solver into an Android app to run while playing Boggle with Friends
  • figure out letter probabilities in boggle or Zynga’s boggle with friends would give better statistics
  • calculate scoring with the special tiles in Boggle with Friends

Quick project: mount for a directional wifi antenna (this one).

Nothing like wifi on a rainy day

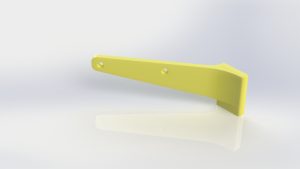
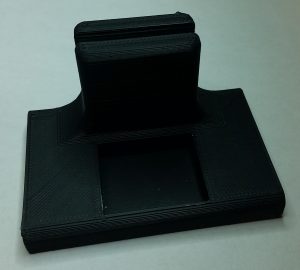
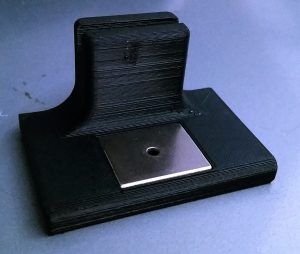
I wanted to mount it in my window in a was that would be convenient to remove or reposition, so I whipped up a mount that used magnets to stick to the metal window frame. For the magnets, I used the same ones as I used for my filing cabinet clip (these ones).

I printed this upside down to avoid requiring any support material.

Then I 3D printed it, screwd in the antenna, and hot glued on the magnets.

The print actually has a slight error about halfway through, but the tolerance on the magnets was enough that it was still usable.

Quick part I made the other day: I keep my clothes in a filing cabinet, and I ordered some of these filing cabinet dividers the other day to divide some of the drawers into sections. Unfortunately, I ran into a problem where, as I shuffled around the contents of the drawers, the dividers would tip over since they weren’t actually mounted at the bottom.

Can't have pants mixing with shorts!

Can’t have pants mixing with shorts!

So, I whipped up a quick part to fixture the bottom of the divider to my cabinet.

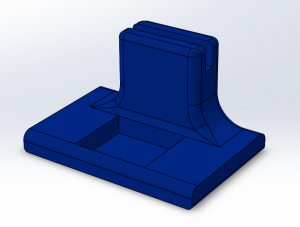
I designed this clip to avoid any features that would catch on clothes. All the edges have large fillets, and the surfaces of the part are flush against the surfaces of the filing cabinet where it is inserted.

I designed this clip to avoid any features that would catch on clothes. All the edges have large fillets, and the surfaces of the part are flush against the surfaces of the filing cabinet where it is inserted.

I used a 3D printer to print a couple. The divider interfaces with the part with a little bit of friction in the slot. A magnet (one of these) sits in the square cutout in the part and holds the part against the metal bottom of the drawer. The part sits in the channel in the bottom of the drawer.

Fresh out of the printer

Fresh out of the printer

The magnet surface is also flush against the surface of the clip.

The magnet surface is also flush against the surface of the clip.

As you can see, problem solved!


I printed a couple of these, one for each divider.

I printed a couple of these, one for each divider.