Spinning

I’ve slowly been acquiring blacklight-reactive props, with the latest being a slinky I bought from Slinky Josh at Ignight. Disappointed that everywhere in the world isn’t flooded with blacklight, I decided to take matters into my own hands–er, wrists. I present my blacklight LED wristbands:

(I’m just an amateur slinky and contact ball, but I hope you like the effect)

Overview

Here’s a diagram of the parts in this build.

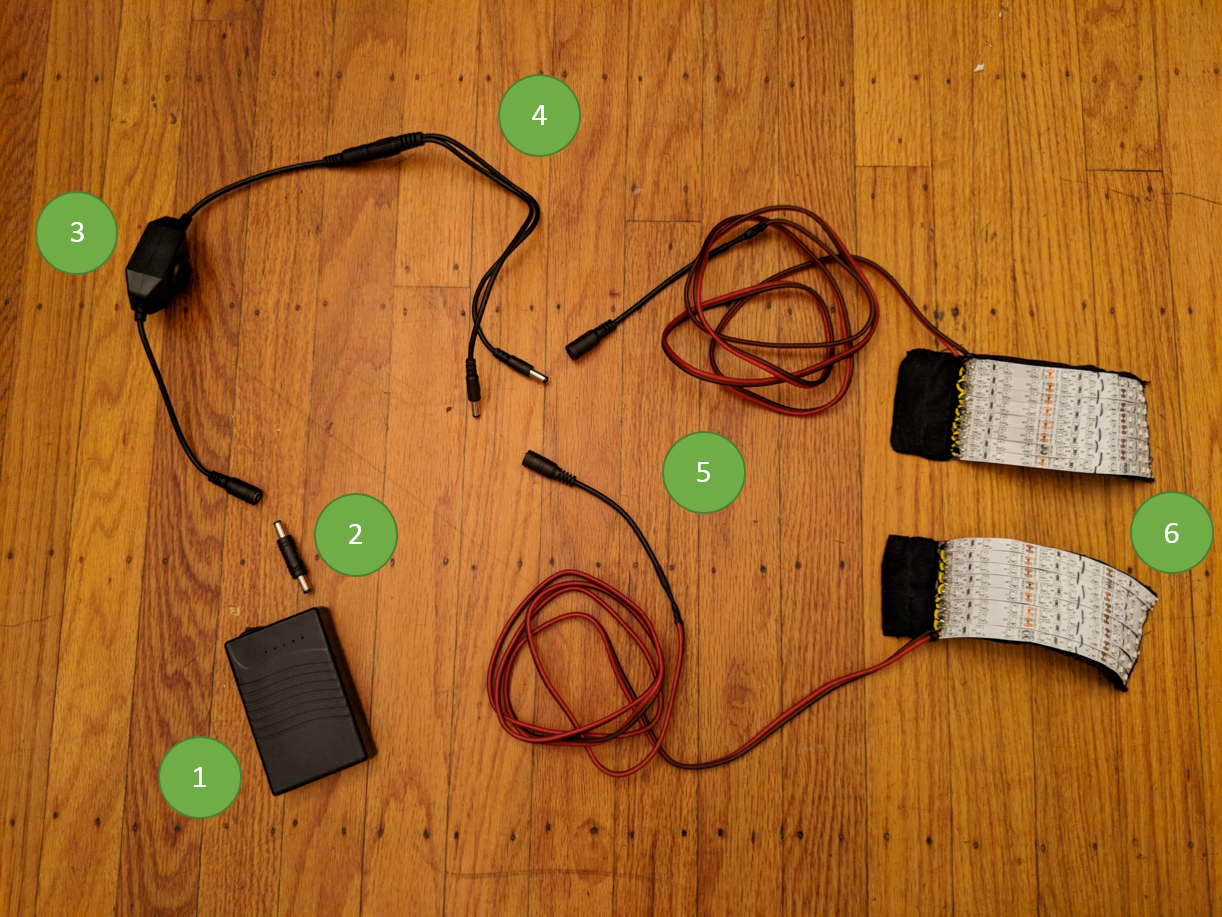
This setup includes (1) 12V battery pack, (2) male-male coupler, (3) 12V dimmer, (4) splitter, (5) wires long enough to go down my arms, and (6) wrist bands

The LED strips are 12V blacklight LED strips, with 8 strips on each wristband. Each strip itself is composed of segments, where each segment has 3 LEDs and a resistor in series. I found 3 segments was a good circumference to wrap around my wrists, so in total each wristband had 72 LEDs. Before buying the battery, I hooked up my LED strips to a voltage source and found that the draw for that many LEDs would be about 850mA.

For the battery, I found a USB battery pack that had a 12V output. I liked the option of using a USB battery pack rather than using a hobby lipo because I feel like USB battery packs look less sketchy to security if I want to take these into a club or something.

Materials

If you want to build your own, here are the materials I used.

  • blacklight led strip (link)
  • 12V dimmer (link)
  • battery (link)
  • splitter (mine came with the battery)
  • power connectors (link)
  • male-male coupler (link) (or you can make your own from the connectors)
  • speaker cable
  • hookup wire
  • rectangle of fabric
  • sew-on velcro (picked some up from Mendel’s)
  • thread, solder, hot glue

Assembly

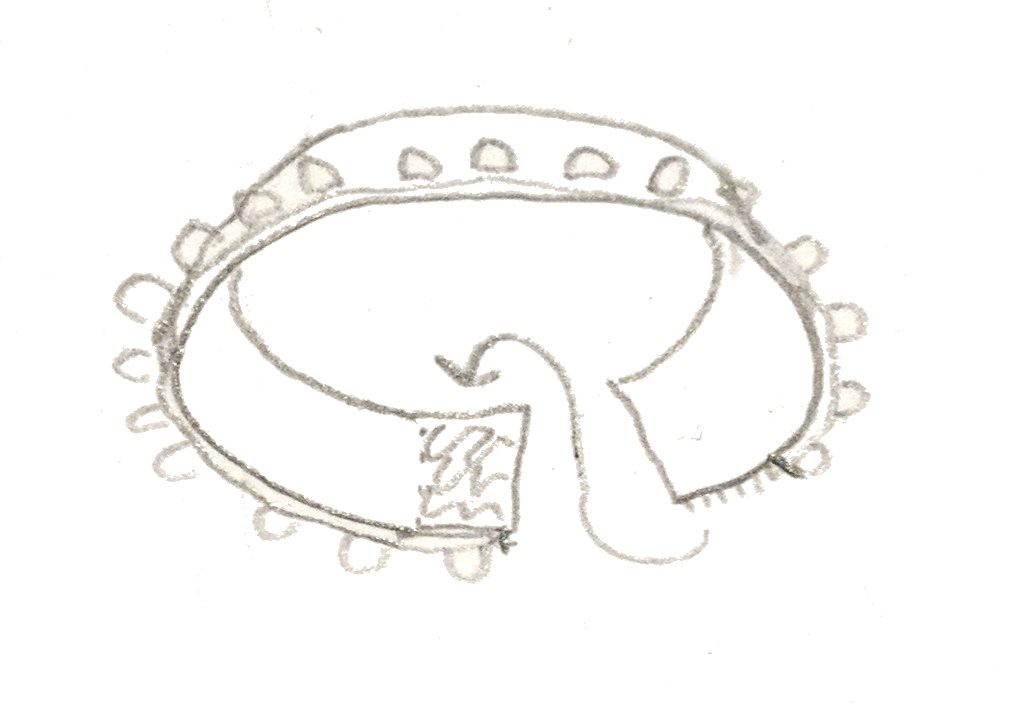
This sketch shows the LEDs on one side and matching pieces of velcro on either end. The fabric extends beyond the LED strip on one end, which is the end where I put the scratchy velcro.

First, I cut out rectangles of fabric wide for the number of LED strips I wanted and long enough to wrap around my wrist with a little extra for the velcro. Then, I hemmed the edge and then sewed on the velcro. This step took a while because I hand-sewed it, but it would be fast to machine sew.

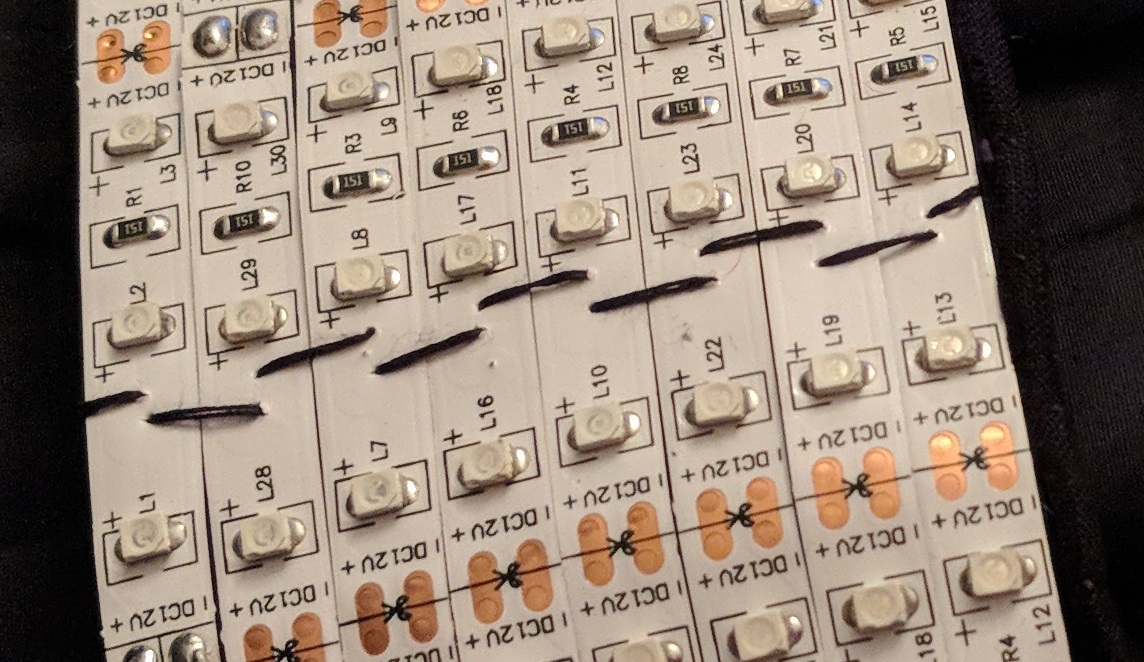
Next, I stuck the LED strips to the fabric, loosely affixed with the adhesive on the back of the strips. I noticed that the LED strips had sections with copper on the sides but no copper running through the middle, so I took advantage of this and sewed straight through the LED strip.

Is sewing through LED strips sketchy?

Next, I soldered together all the strips using short pieces of wire to connect all the ground pads and all the 12V pads. Besides the hand sewing, this step took the second longest, partially because it was hard to pin everything down. If I were making a lot of these, it might be worth it to make a tiny PCB with connected ground and 12V pads that just acts as a backing to solder the strips to.

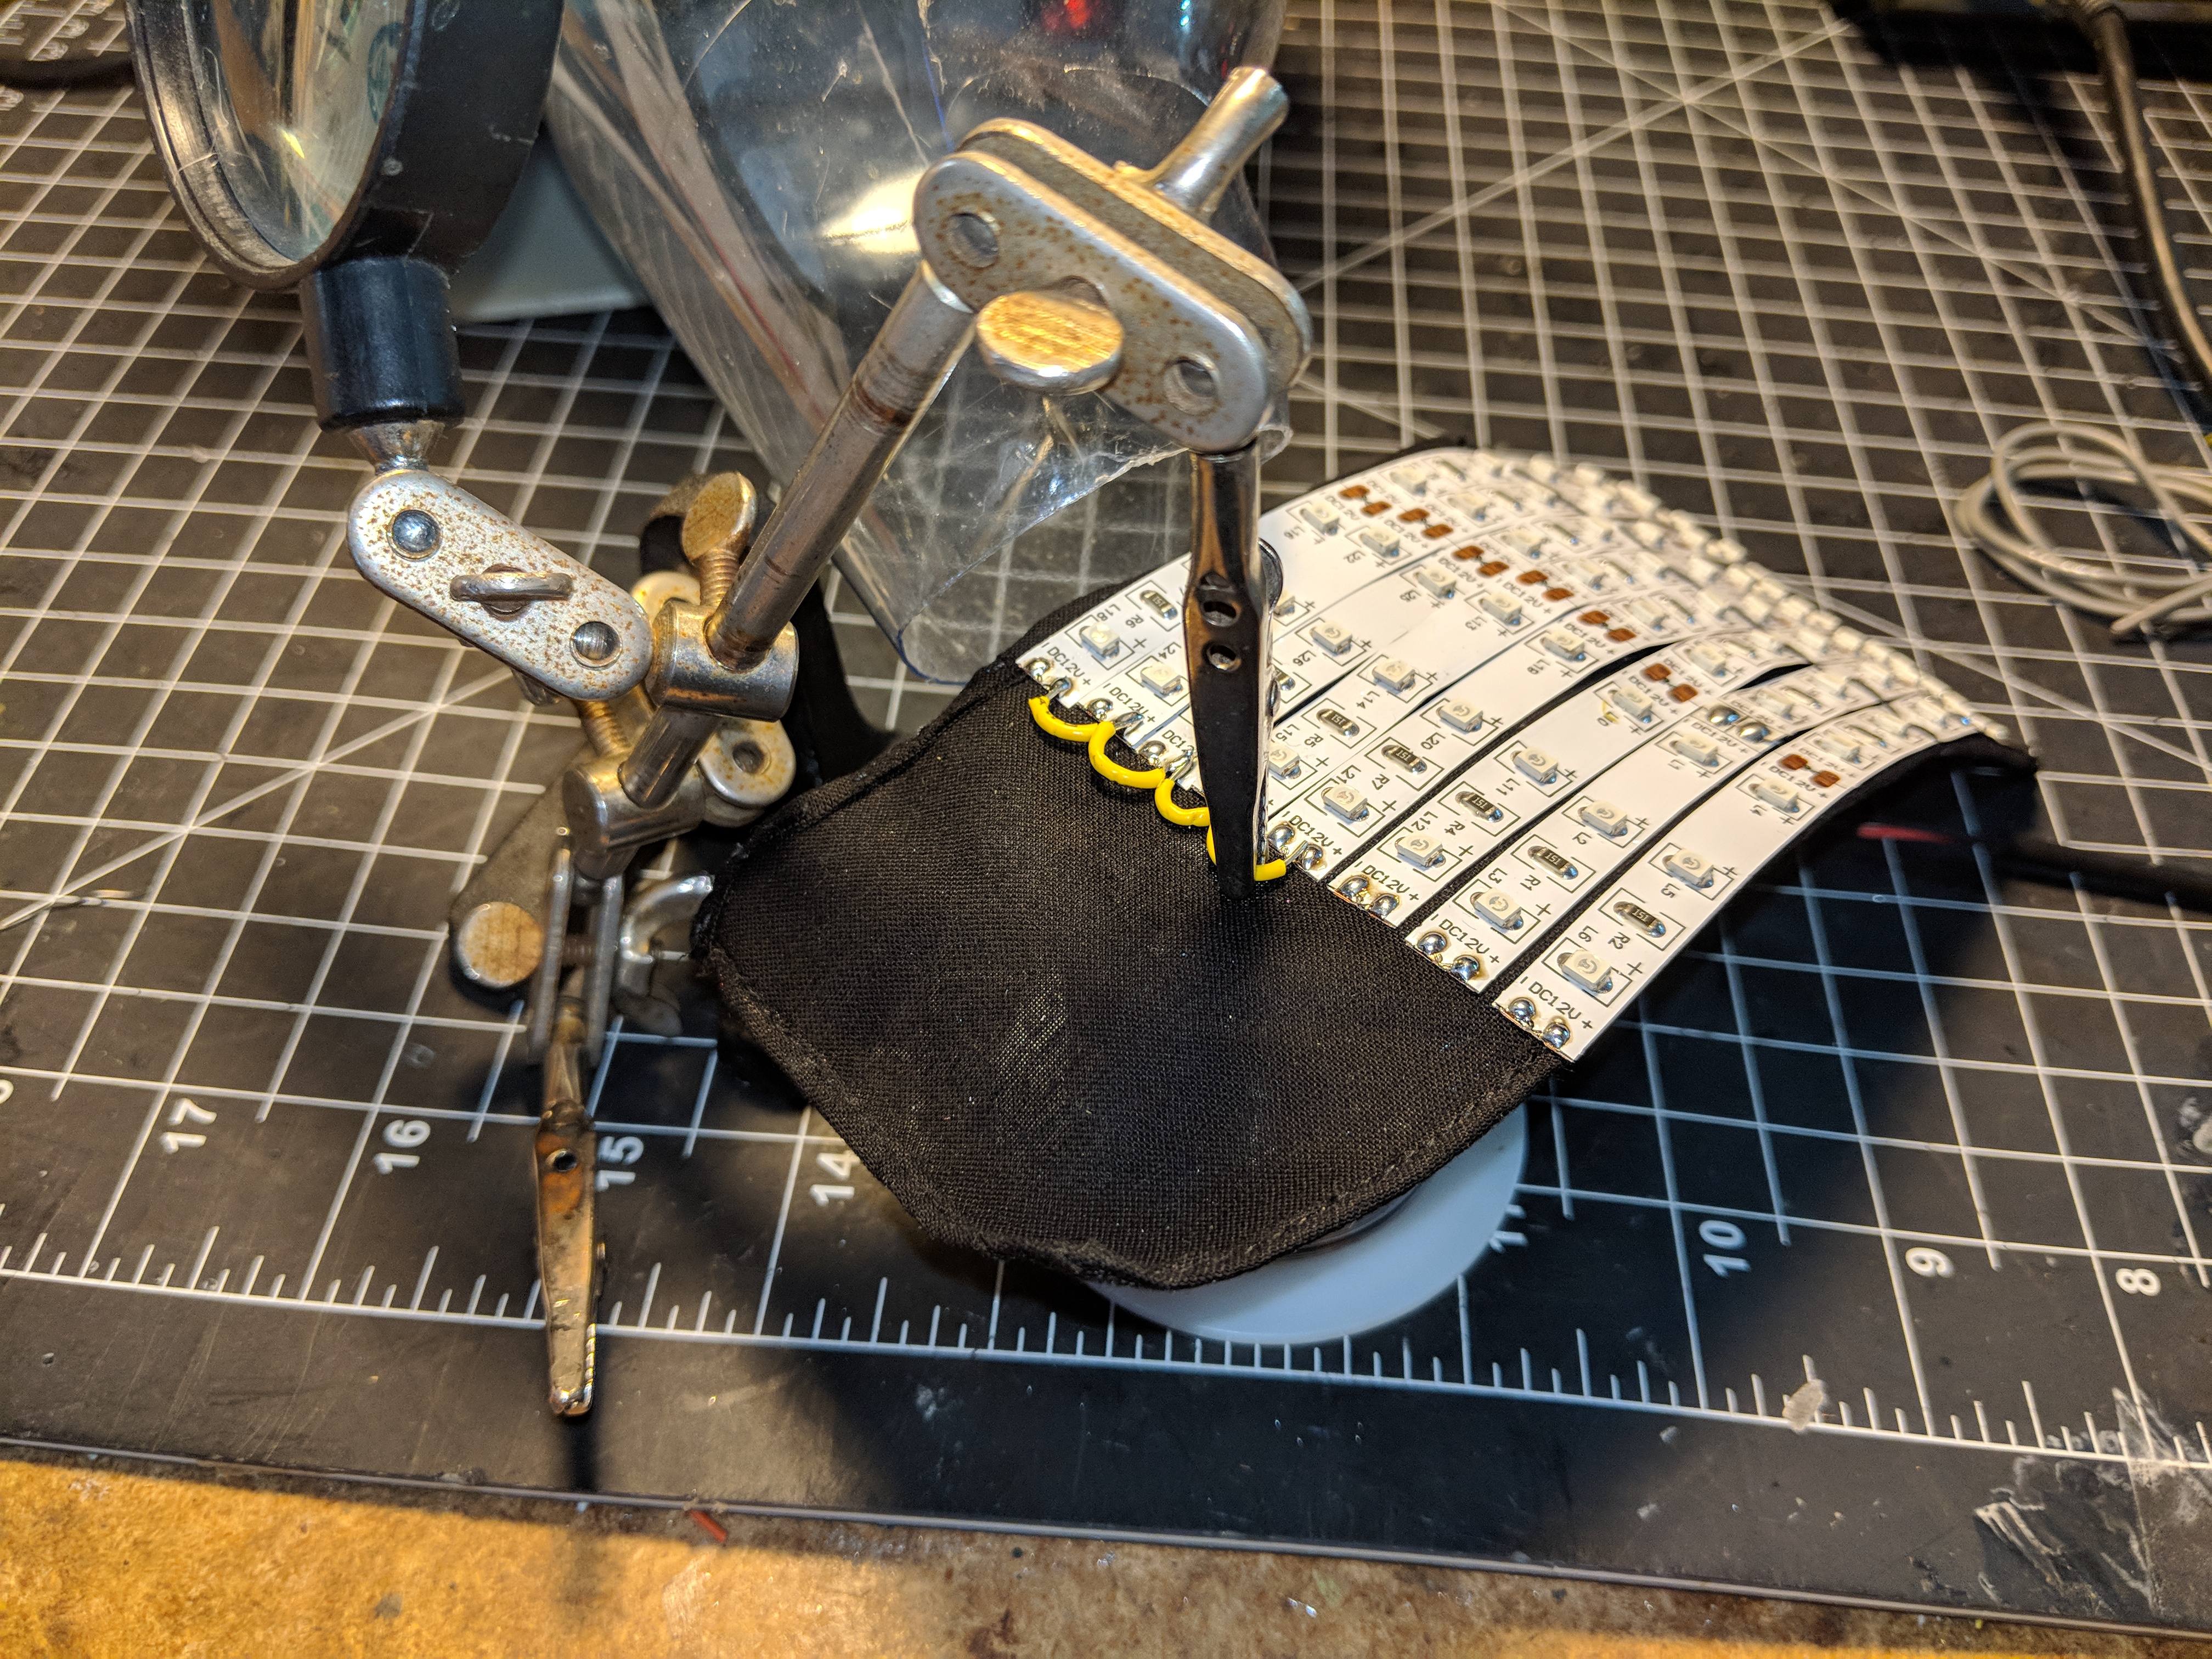
I used the helping hands to hold the wire and also pin down the wristband as I was soldering.

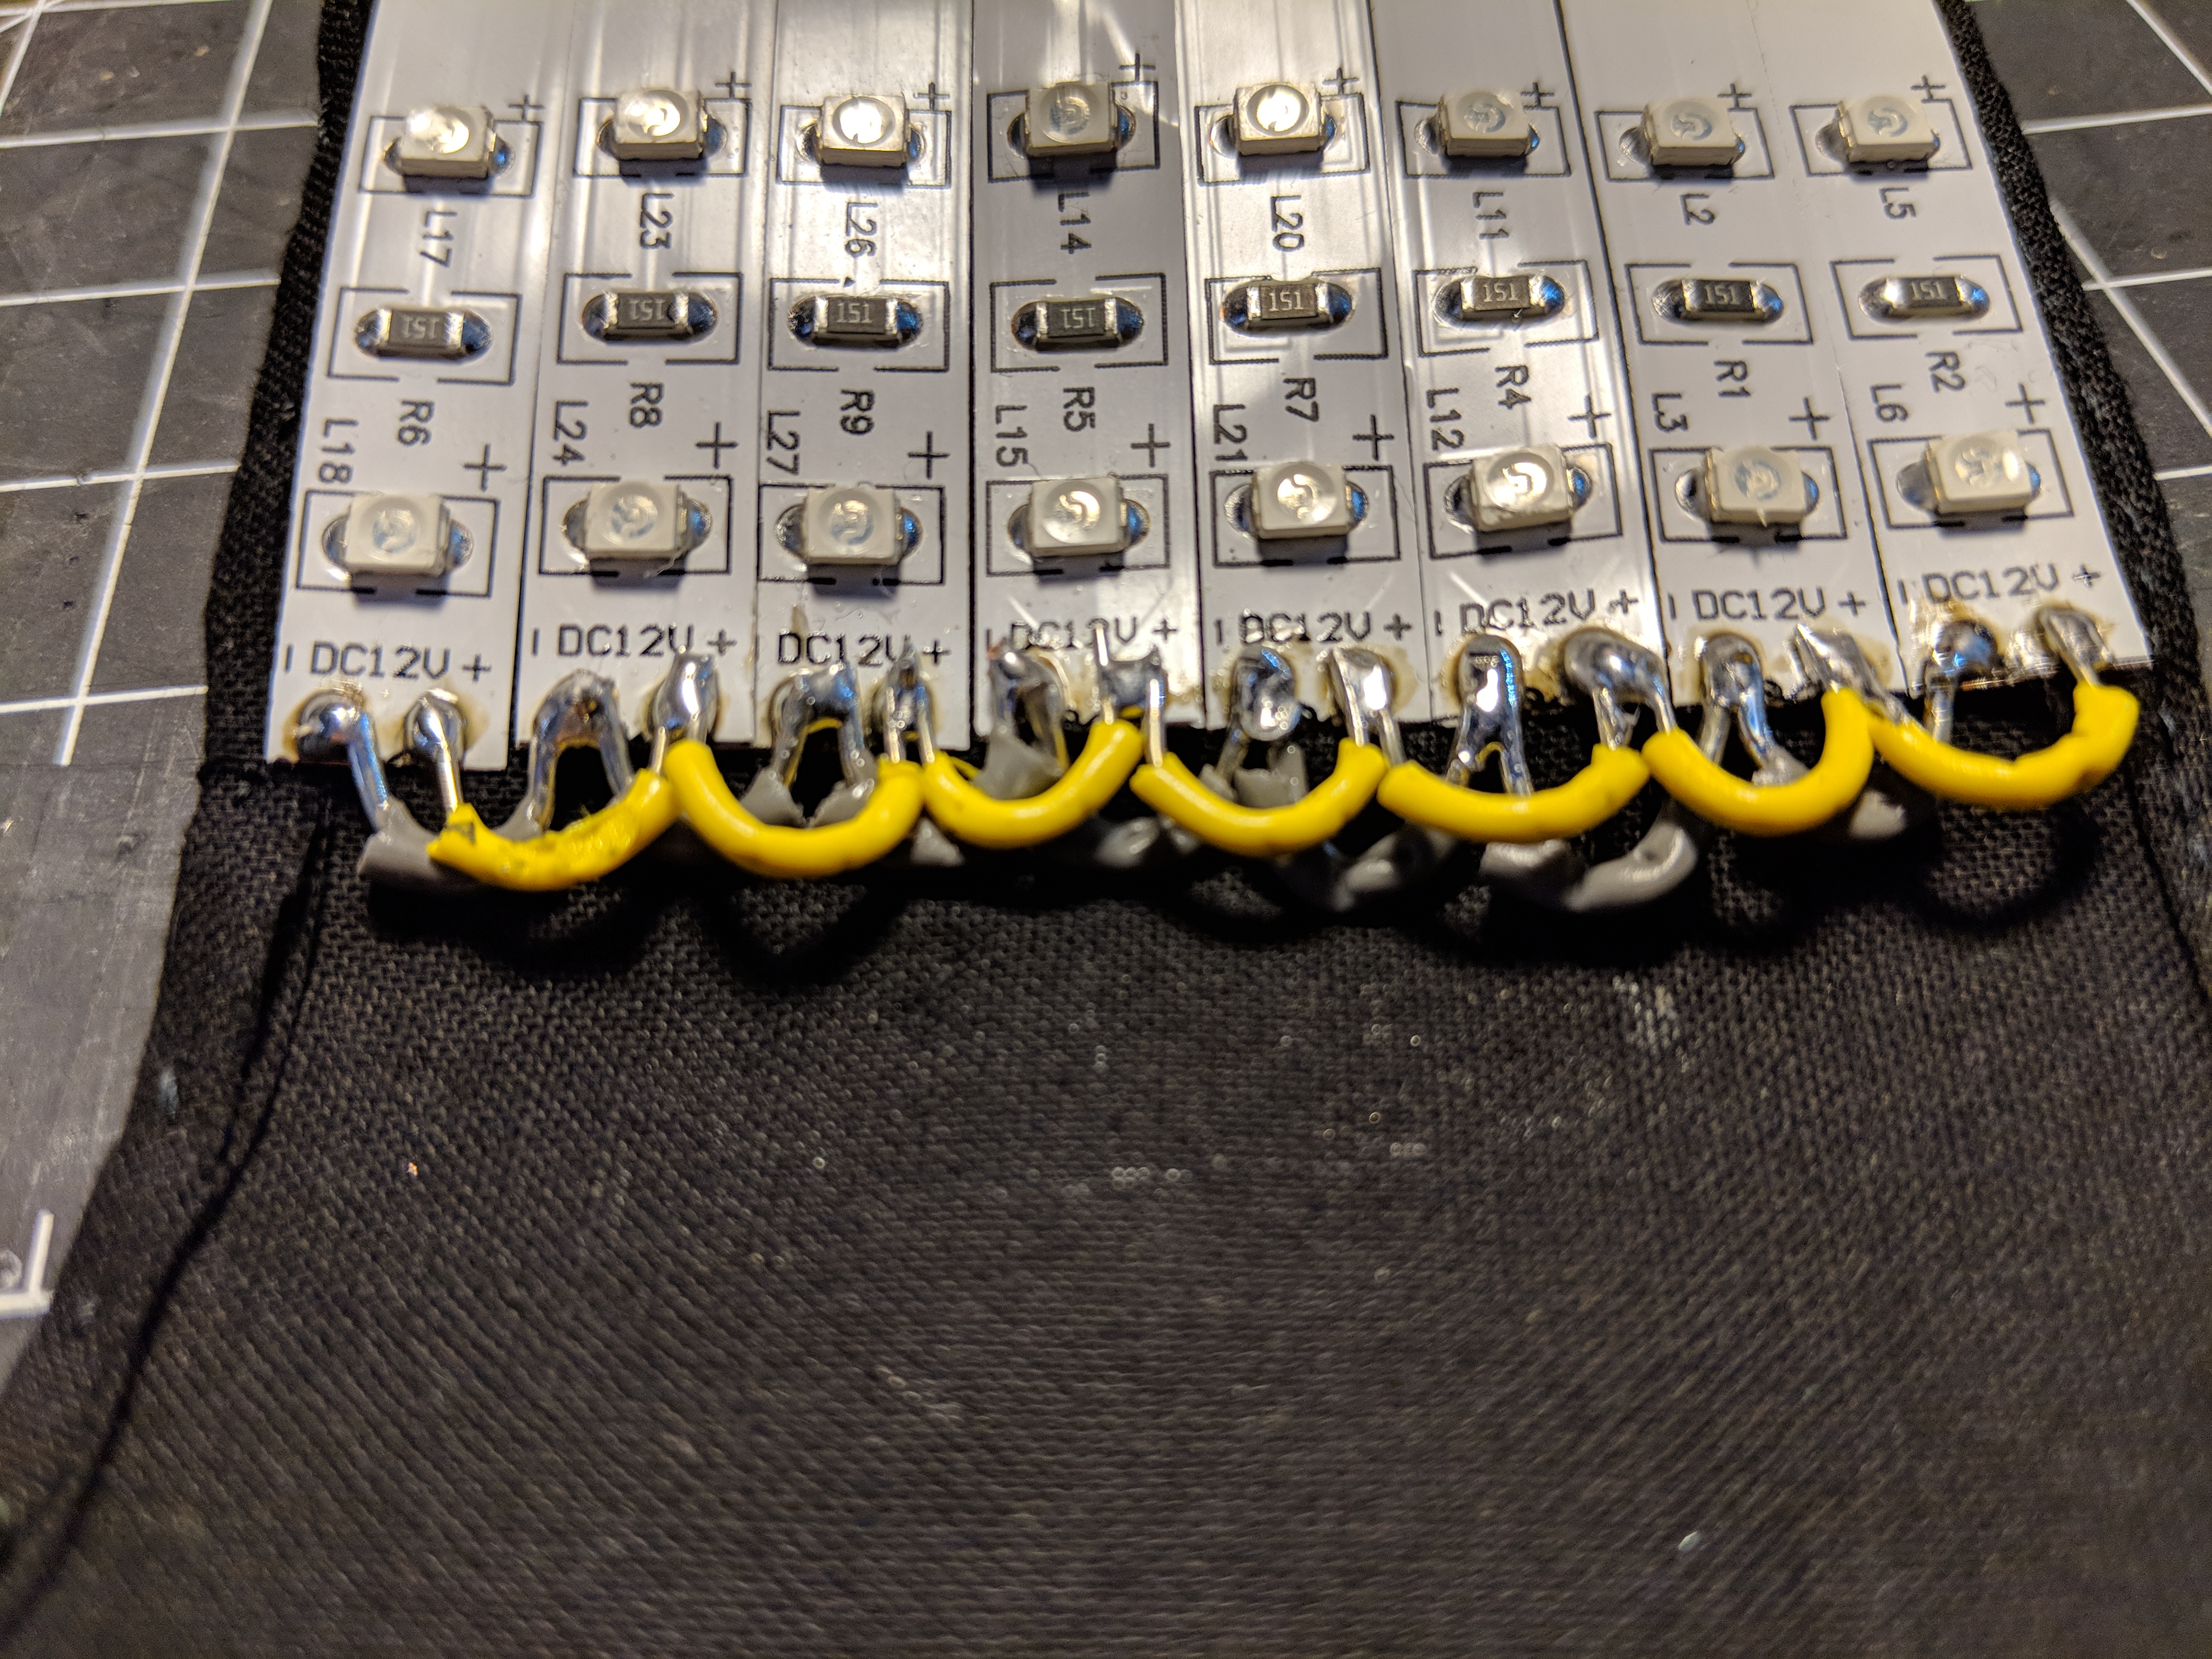
The strips are soldered together in parallel here, with all the 12V pads together and all the ground pads together.

Anyway, after soldering everything, I used some thread to secure the wires to the fabric, and then I coated all the connections in  hot glue, to cover the exposed copper and for strain relief. I also  soldered on the long wires and female power connectors.

Final assembled wristband

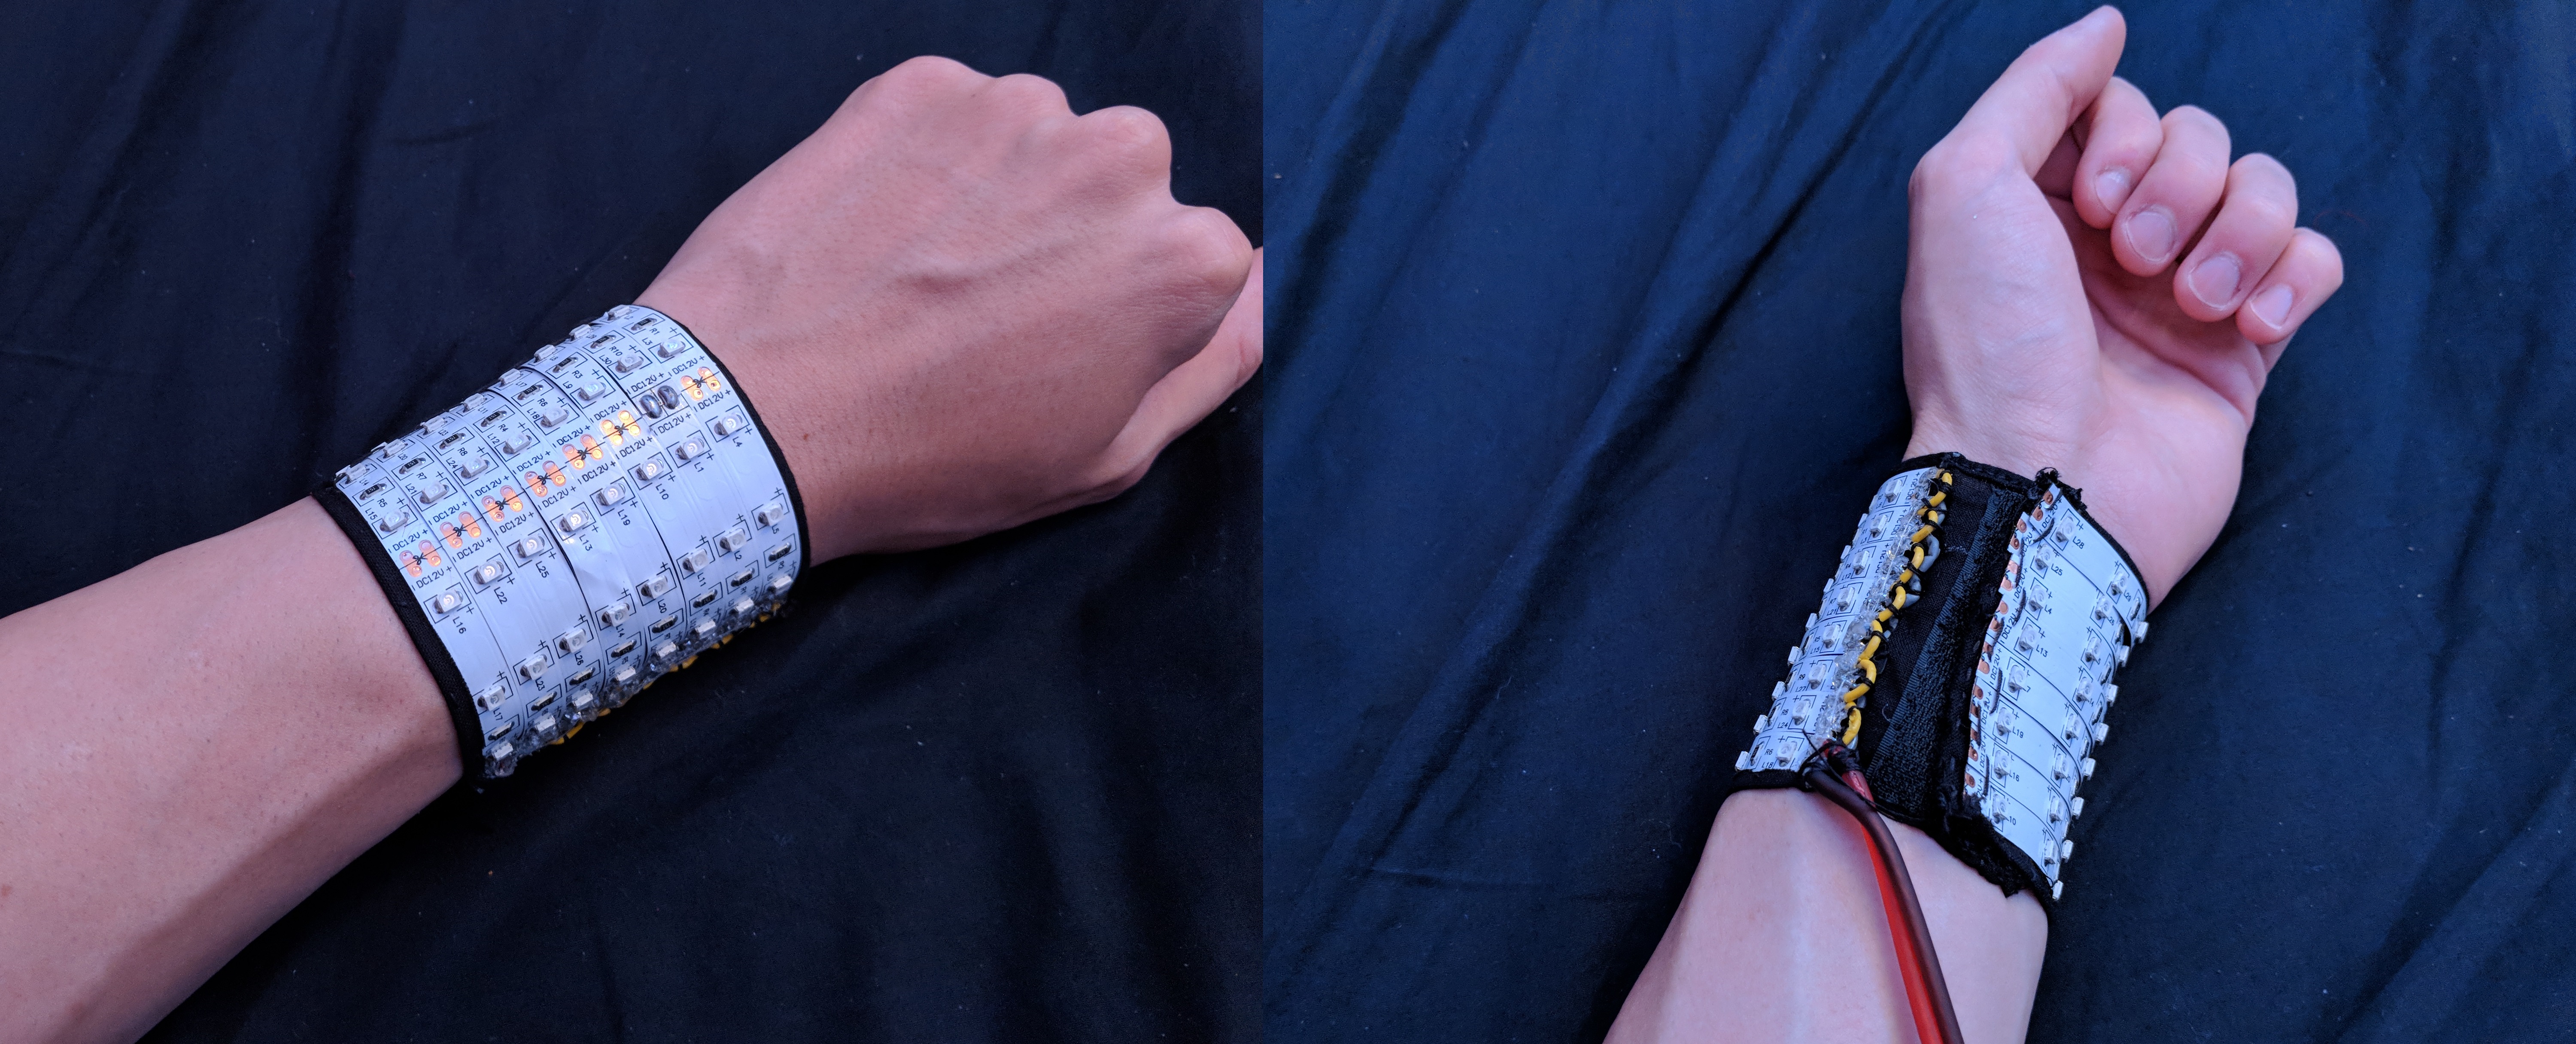
Here’s the front and back of the final product.

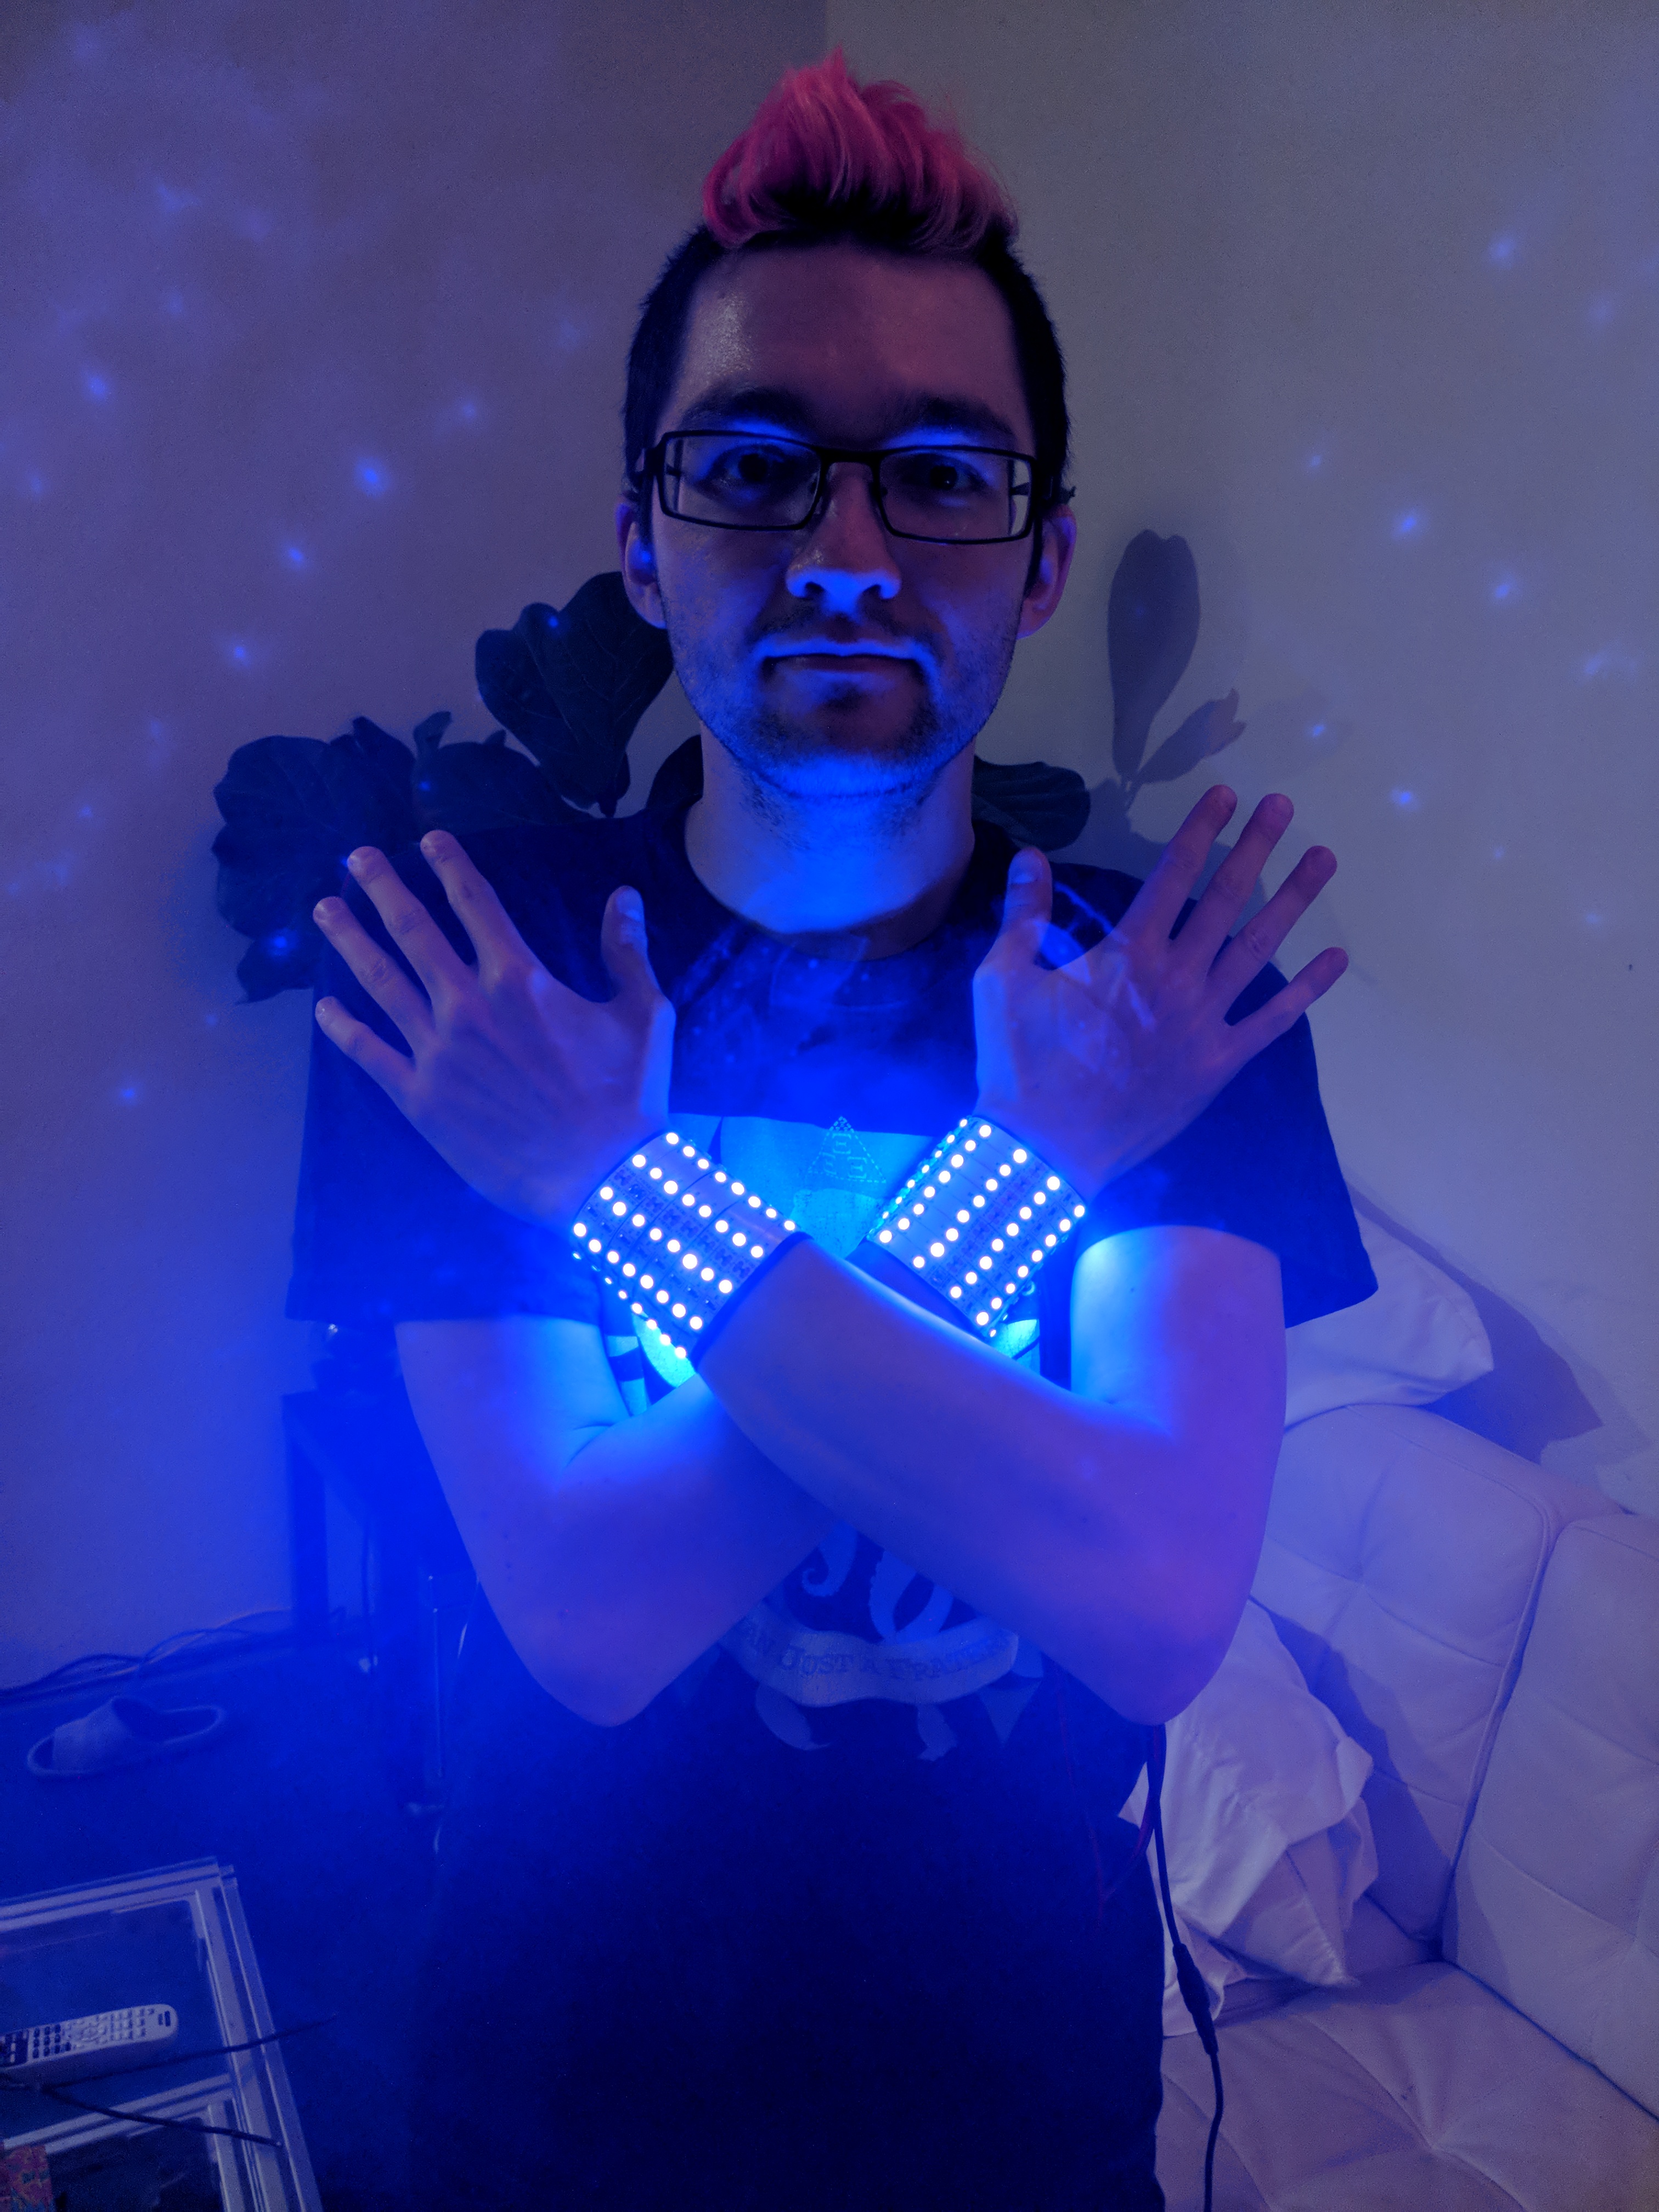
Added bonus: the lens flare makes my hands shoot lasers.


Sweet new staff covers

Unsatisfied with the availability of red+black fuzzy staff covers on the market, I recently constructed some staff covers for my new contact fire staff from Dark Monk. This was my first sewing project, and I couldn’t have done it without my friend Casie. Thanks Casie!

As shown below, my idea was to make a fuzzy staff cover in a bottle shape my attaching three pieces of fabric together along with a zipper.

Here’s a quick sketch of how I imagined constructing the staff covers, out of the three pieces shown in the middle. The spikes on the staff head are supposed to be fur, not fire lol.

Based on this idea, I constructed the following pattern, which consists of a circle shape and a shape like a rectangle connected to a letter C. I used a SolidWorks drawing in order to get the geometry of the cone correct. After I printed out the pattern, I added a half inch of seam allowance (extra material for the seam) by hand, but I realize I could have added this to my Solidworks drawing as well.

I printed and cut out the above pattern to use to cut my material.

After creating this pattern, I used it to cut my material, which was a piece of red and black fuzzy fabric. I also cut a piece of flat black fabric in the same shapes to be used as an inside lining. Then, I basted (fastened loosely with thread) these two fabrics together to create a single circle-shape and a single rectangle-plus-C shape of double-layered fabric.

When I was cutting the material, I accidentally cut it with the fur laying in the wrong direction once and had to re-do it for one of my covers.

Next I followed the sewing process shown in the following picture:

1. sew the edges of the C shape to the rectangle
2. with the lining facing outward, sew in the zipper, connecting the two short sides of the rectangle
3. sew on the circle piece to opening at the top
4. (not pictured) flip the piece so that it’s no longer inside-out

Above is pictured an overview of the order in which I sewed each seam.

Here’s the final result!

Here’s one head with a fuzzy staff cover.

As you can see, the zipper works great and it also nearly invisible in the fur when zipped closed.

And here’s a video of me doing a Steve because, you know, that’s the only trick i know.

Hiya! I haven’t made any posts recently, so I’ve got a backlog of a couple projects to write about. Besides personal projects, I’ve also had a lot of life updates in the past year. First, I graduated! I interned at two companies, and now I’m back at school, working on a master’s program with the Biomechatronics Group.

In contrast to all these technical endeavors, I thought I’d start off with some relatively artsy projects.

Recently, I’ve been learning to spin fire fans. A video speaks a thousand pictures, so here’s a video from my very first fire fan performance, at Steer Roast 2016. Credit to Ivan F for the video.

Prior to getting fire fans, I wanted to build some practice fans. Here’s my first prototype:

adf

Here’s my first prototype, cut out of green acrylic.

I sketched up a lotus shape in solidworks and cut the shape out of 1/4″ acrylic with a laser cutter. Acrylic is not the appropriate material for the final application — you can see this fan already has a crack in it, but I wanted something to play around with first.

Based on this version, I changed some thicknesses and cut new fans out of 1/2″ clear polycarbonate. The polycarbonate is more appropriate for the impacts that I expect these fans to take. I got polycarbonate from a lab cleanout on campus–the sheets used to be splash shields for some kind of chemical process. I used a waterjet to cut out this version

20141012_000126

I sanded down the finger hole in the middle to be more comfortable

Now that I have some fire fans to compare the weight with, I’ll make some more modifications. One popular choice of material for practice fans is HDPE for its slickness. Indeed, the polycarbonate fans I made are rough on the hands. However, HDPE is very brittle for this application. I’m considering making polycarbonate fans with press-fit HDPE finger rings for my next version. I also like how the polycarbonate is translucent–I’m considering inserting LEDs in my next version to made a rave-ready pair of practice fans.

What do you think would be good features in fans like these?